Thursday, March 31, 2011

All Scrubbies - are not created equal...

Did you know that scotch brite scrubbies come in different grits, just like sandpaper?  Yes, they do ...  Here's a chart that shows the various colors and their corresponding grits..

SCOTCHBRITE GRIT CHART

7445 - White pad, called Light Duty Cleansing - (1000)

7448 - Light Grey, called Ultra Fine Hand - (600-800)

6448 - Green, called Light Duty Hand Pad - (600)

7447 - Maroon pad, called General Purpose Hand - (320-400)

6444 - Brown pad, called Extra Duty Hand - (280-320)

7446 - Dark Grey pad, called Blending Pad (180-220)

7440 - Tan pad, called Heavy Duty Hand Pad - (120-150)


The white  -1000 grit - is perfect for applying paste wax.  Just cut a square, keep it in your wax tin and use it over and over.

Light grey - 600 to 800 grit - is great to polish and 'de-nub'.   After you stain your piece you don't want to sand in between coats of finish (or you will go through the stain) - but you might have raised wood grain that makes it feel rough.   Well, you can just use light grey scotch brite to give a smooth base for your next coat of finish..

The green - light duty 600 grit - is the 'all purpose' choice for everything from ceramics to scrubbing pots. 

The heavy duty grits are a big help when using paint strippers, or getting through a tough finish..

Now that you know all the choices, you can pick the perfect one for your next project!!! 


Tuesday, March 29, 2011

Work Smart -- Half Rounds & Portable Table

I've learned a lot of smart tips while working at Robert Ortiz Studios - http://www.ortizstudios.com/ - and lots of them are just as valuable for crafts and DIY projects as they are to the professional woodworker. 

Tip #1 ---   Half Rounds ---Once you see how smart it is to use 'half rounds' you will wonder how you ever got along without them.  Half rounds can be described as a wooden dowel literally cut in half! Use them to lift your project off the work table - which provides just enough space so you can reach the sides and ends neatly.   I suggest you have at least 4 - maybe 6 - half rounds.... ask your hardware store to cut them 24-30 inches long.   A sturdy mailing tube is a great way to store them - you can even store your yardsticks and levels in the same place.

Here half rounds are shown with the flat side up --
but you actually use them with the flat side down....
This bubinga top is lifted so I can easily reach the sides and ends..

Tip #2 -- Portable Work Table -- Don't have a work table?  No worries - for about $50 or less you can easily assemble a portable work table.  Invest in two folding saw horses and half a sheet of plywood (2'x4').  You can set up this table in minutes wherever it's needed, and then store it away without taking up valuable floor space.  Add a pretty table cloth and you also have an extra buffet table..  and who doesn't need an extra table sometimes?


Monday, March 28, 2011

Sandpaper Trick

Every time I share this sandpaper 'trick' with the art classes they LOVE it.   Once you see how simple it is you will be amazed...
1) start with a full sheet of sandpaper -- cut into 4 equal pieces


2) fold and score each quarter sheet into quarters - cut one score just to the middle


3) fold one flap up, then over, and down -- now you have 4 clean sides of sandpaper -
 you can fold and re-fold to a clean side as needed


Remember - the only area of your piece that is being sanded is the space just under your fingertips ...


Sand in the direction of the wood grain - but align your fingers perpendictular - so that your fingertips are moving sideways with the grain and not up and down with the grain -- the reason is that each fingertip has a different strength and applies different pressure.   If you go up and down you will essentially create valleys.
Not only will these tips give you a better finished product they will also save you money


Sunday, March 27, 2011

Picture This ....

Here I am, once again, sending out a hearty "Thank You" to Melissa and the staff of Salon At Chestertown (www.salonatchestertown.com )   They have been generous enough to host two more of my art pieces. 

"Blue Morning Glories" welcomes the clients as they are offered coffee and snacks at Salon


"Red Geraniums" keep company at Melissa's station.

Both of these pieces started as old windows, then I removed the glass and replaced it with mirrors.  
Each design is painted right on the mirror, baked to be permanent, and re-installed in the frame.

It's tricky to take photos of mirrors, even when the reflections show a nice background.   Still, I think the art work comes through very well here.  If you have a window-less room, or a dark wall, or need a mirror with a little pizazzz -- then here you go.....
both pieces are for sale


.


Protect with Varnish

Some of you know that I work at http://www.ortizstudios.com/ - where Bob creates the most gorgeous furniture you have ever seen (REALLY!!) --- and I do all the oil finishes.   There are a variety of finishes we use on the furniture, depending on the look and durability we want to achieve. 


This is the piece we just finished last week - beautiful computer/office cabinet of mahogany and wenge.  I used Tried & True linseed oil - 5 coats on the top and 3 on the case.

But your artwork deserves a beautiful protection too - and here's one method that our friend Kathy recommends........

1)  Apply seven coats of matte varnish. Do not sand between coats. Let each coat dry 20 minutes. After seven coats let dry overnight.


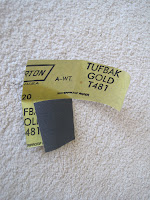
2)  With 600 grit black wet-dry sandpaper dipped in one cup of water with one drop of dishing washing liquid (any brand) gently rub with the grain. Be careful to use a gentle touch, especially on edges or over dots.  This dulls down any shine.

3)  Wipe with a paper towel to dry.

4)  Using #0000 steel wool pad and neutral Kiwi shoe polish (use a good amount) rub in hard.

5)  Using a clean piece of #0000 steel wool wipe off excess shoe polish.

6)  Buff with a clean soft cloth.
 
7)   Admire and Enjoy!!
 
Stay tuned -- in the next few blogs I will give you tips on more finishes, sandpaper folding, and some smart working ideas from the wood shop...   did you know that 'scotch brite' scrubbies come in different grits just like sandpaper??

Thursday, March 17, 2011

Painted Furniture Workshop

What do you think of when I say "Painted Furniture Workshop"?  Well, it's kinda hard to describe --- especially since every one is totally different.   So let me just tell you about the one we had recently in Virginia Beach.  Beth Wagner is our very talented teacher - in this workshop she's more like our leader and  mentor.  Each person comes to class with their 'blank slate' - sometimes they even have a design idea for it, but even if they dont ... when they get to class - all it takes is a  little 'brainstorming' with Beth --- the creative energy starts to flow and your idea is born!  The first day is all about backgrounds, prep work, and developing our ideas.  As we work, there's a great group energy - we are inspired by each other -- all under the guidance of Beth's creative talents. We start with a little idea, it grows --- we build it, and it grows again.

This little two-tier table was first painted green, then painted white.  Once Cindy sanded the edges, the green layer came through to give it interest and dimension.  But she didnt stop there -- she added border details and roses on both top and shelf.  She's says she'll use this as a side table in her great room ----  I can tell you, everyone will think its too pretty to put a drink on ..

Just look at this little table - What a great design!
Notice the subtle detail around the border.
This is a gift her husband will surely appreciate - and she painted him a jewelry box to match!


We couldnt have a class with Beth without featuring roses ....   here's just two beautiful examples.


Kathy's project was a fireplace screen.   First, she taped off a border and painted a soft multi-colored background to the center.   Then she re-taped it and painted the edge blue.  She took another step and added a stencil design over the border.  For the final hooray she painted a glass vase filled with flowers for the center piece.   This is already an heirloom her family will treasure .... 


Look at this sweet little travel trunk with a beautiful dome top.   The lucky little girl who receives this can fill it with dress-up clothes now and memories later  - for it's certain she will cherish it always.

The background of the trunk is painted with soft dreamy, cloud-like colors.  You can see nose-gay flowers and ribbons spilling from the corners - and very lovely personalization on the top -- what a treasure!


The design on this bar stool grew from the inspiration paper you see posted on the wall.  It's a black  background with all grey and silver designs -- a little silver leaf and it will really sparkle.


It seems that little girls' dreams were the inspiration for a few pieces in this class.  Here you just see the door to a little storage cabinet - but each side and the top were painted with whimsical sea creatures and bubbles.   What little mermaid wouldn't love this??

And, finally ----
here's the proud teacher taking a shot of our group.
Each person went home with a unique work of art and more than a few ideas for future projects.

We're already looking forward to another workshop at the beach March 2012
-- and you can join us if you like --
(registration forms at http://www.brendastarstudios.com/)
the only thing I promise is .... It will NOT be like any other class you have taken ---
and --- you will LOVE IT -- more than any other class!


Monday, March 14, 2011

And the prize goes to .....

Don't you just love when they call your number and you've won the prize?   Well....... I can tell you that the girls in my art classes do love it.
Ever since I've been sponsoring these classes in Va Beach I've drawn a name (or number) for a winner each day.  
Sometimes they win a bottle of wine --- that's always a welcome gift. 


One class received blown glass mermaid ornaments,
and one class received ceramic mugs that can be painted.  

 Last week I gave out ceramic brush holders for the second time --
and I think this was everyone's favorite!  It surely was the favorite of
Joyce, Frances, Kathy and Maureen
 ---
they were this year's winners!!!
It has 4 compartments - two tall and two short -
which can hold and separate  brushes and painting tools. 
It works just as well to hold bathroom supplies, or kitchen utensils
(but, really --- no painter is going to give it up for any other use:)

This ceramic technique is called crystals -
and the name of this paint is "Monsoon Seas"
which went right along with our Dolphin theme for this class.

So now I have a few months to come up with the next great door prize---
(I'm open to suggestions :)

Saturday, March 12, 2011

Love the Salon ...

I love Salon at Chestertown ....
http://www.salonatchestertown.com//
 and not just because they hosted a lovely showing of my traditional Baltimore Screens --- although I loved that too.   They have a gallery wall that compliments the artwork perfectly, and they are generous enough to invite local artists to show their work.   I was the lucky featured artist from November through February!  I appreciate the opportunity.


 Salon is a great asset to the women (and men) of Chestertown. Melissa and Heather are experts in their field of hair and makeup - they make you look and feel great.  .  Make an appointment today -- you won't regret it ......   and..... you'll get to see their featured artist too!!

Twelve Years!!

Wow - you know what they say about 'time flies when you are having fun'......
Well, I've been having fun working at Ortiz Studios (http://www.ortizstudios.com/) for twelve years now!! 
And, believe me, that time has gone by fast ...

I don't know the exact date I started, but it was early March - and every year Bob indulges my sentimental side with a little celebration.

This year we had cupcakes on Wednesday and went out to lunch on Thursday.
Thank you, Bob .....
Looking forward to the next twelve :)